ubuntu 18.04 安装 mysql-server 5.7
MySQL是一个开源数据库管理系统。它使用关系数据库和SQL(结构化查询语言)来管理其数据。本教程将解释如何在Ubuntu 18.04服务器上安装MySQL版本5.7。因为MySQL 5.7版本采用了全新安装机制,改善了MySQL的安全性,所以导致一些和以前安装不太一样。比如:root密码设置放置到了安装完成之后的安全设置中来(这个坑我爬了半天… …),还有一些其他的安全设置等。
1.安装 mysql
在Ubuntu 18.04上,默认情况下,只有最新版本的 MySQL 包含在APT软件包存储库中。目前来说是MySQL 5.7。
首先在安装之前需要更新服务器上的软件包索引然后才能使用apt安装默认软件包:
$ sudo apt update
$ sudo apt install mysql-server
接下来便会开始安装MySQL,但这里不会提示设置密码或进行任何其他配置更改。(这里与我在ubuntu 16.04上安装不一样。从网上查阅资料得知:因为这会使MySQL的安装不安全,目前已经使用在安装后执行安全设置来代替这一点)
2.配置MySQL
对于全新的安装模式,需要首先运行附带的安全脚本,这样才能进行接下来的数据库访问。 这改变了一些不太安全的默认选项,例如远程root登录和示例用户。 在旧版本的MySQL中,是需要手动初始化数据目录,但现在会自动完成。
运行安全脚本:
$ sudo mysql_secure_installation
接下来将会通过一系列提示来对MySQL安装的安全选项进行一些更改(这一步非常重要):
首先便是要求设置root用户的密码:
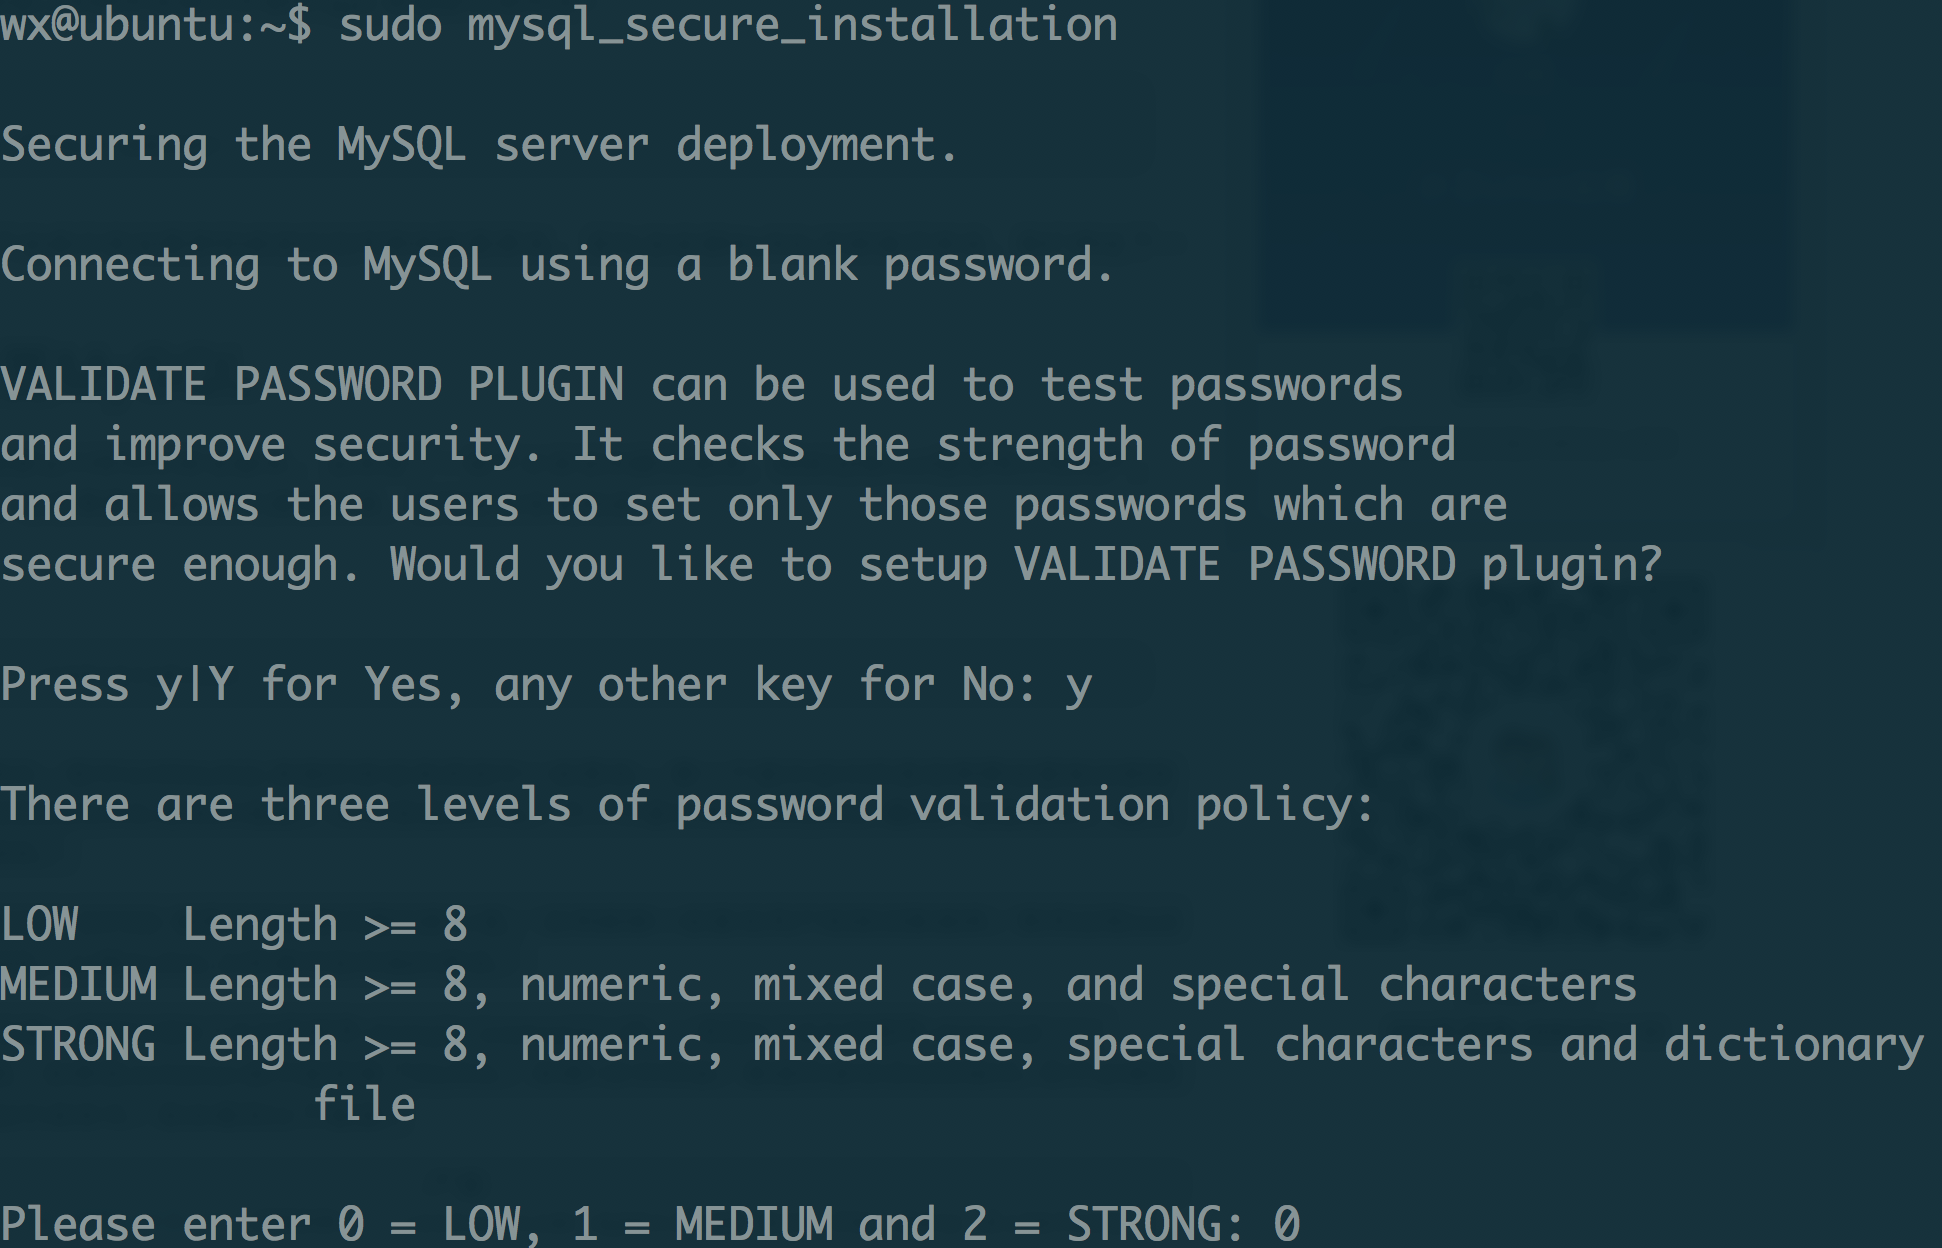
在成功设置root密码之后还会有一系列的一些安全设置:
Do you wish to continue with the password provided?(Press y|Y for Yes, any other key for No) : y
By default, a MySQL installation has an anonymous user,
allowing anyone to log into MySQL without having to have
a user account created for them. This is intended only for
testing, and to make the installation go a bit smoother.
You should remove them before moving into a production
environment.

Remove anonymous users? (Press y|Y for Yes, any other key for No) : n

 ... skipping.


Normally, root should only be allowed to connect from
'localhost'. This ensures that someone cannot guess at
the root password from the network.

Disallow root login remotely? (Press y|Y for Yes, any other key for No) : y
Success.

By default, MySQL comes with a database named 'test' that
anyone can access. This is also intended only for testing,
and should be removed before moving into a production
environment.


Remove test database and access to it? (Press y|Y for Yes, any other key for No) : y
 - Dropping test database...
Success.

 - Removing privileges on test database...
Success.

Reloading the privilege tables will ensure that all changes
made so far will take effect immediately.

Reload privilege tables now? (Press y|Y for Yes, any other key for No) : y
Success.

All done!
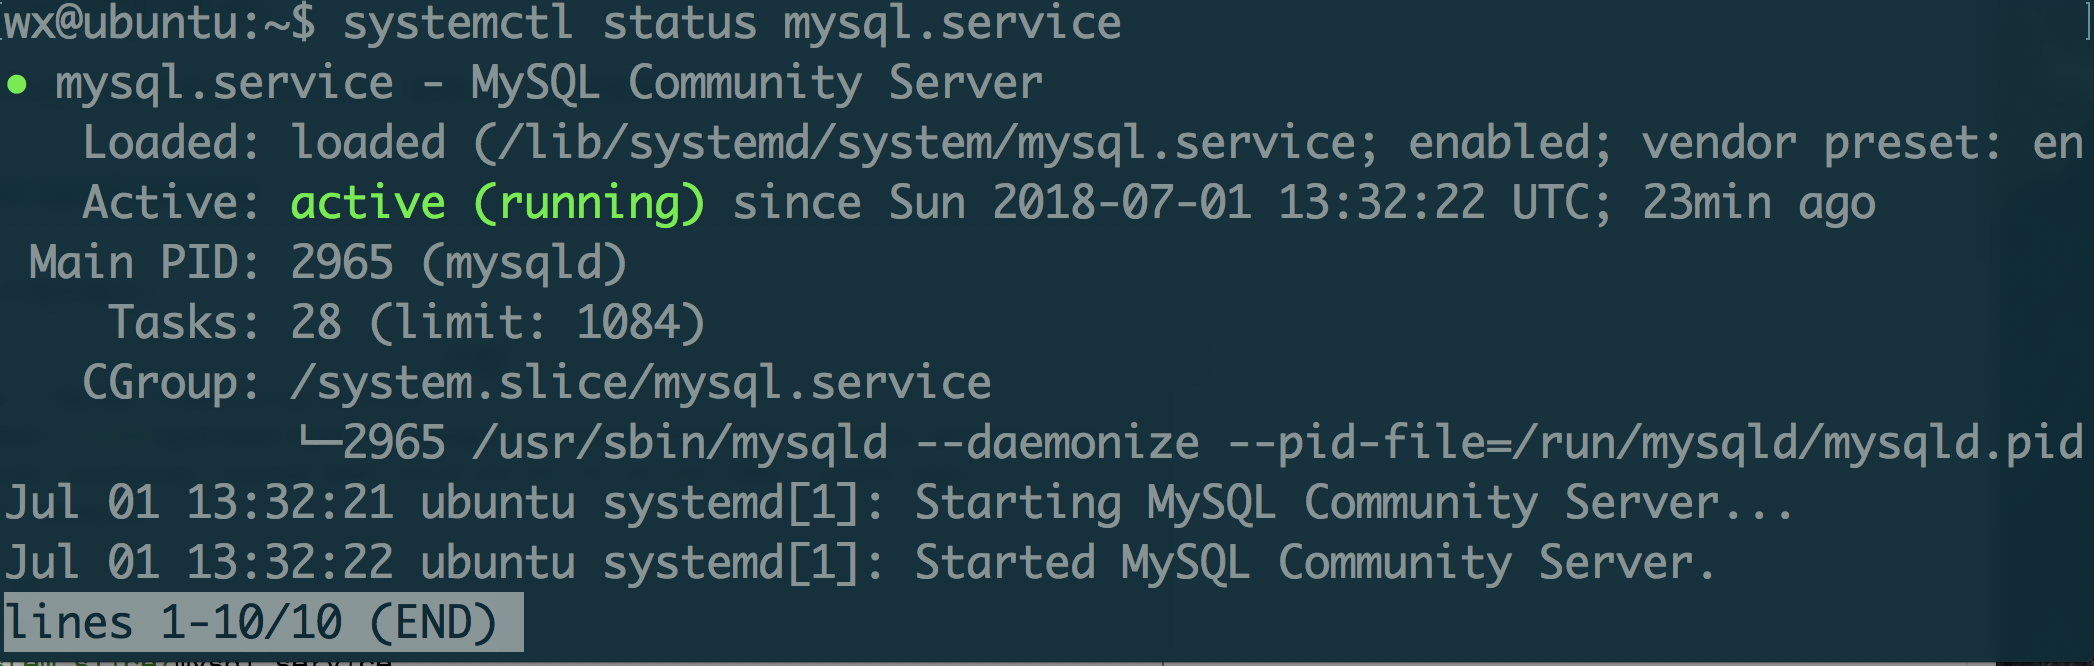
验证mysql安装
首先可以通过以下命令来查看mysql的运行状态:
$ systemctl status mysql.service
显示结果如下即表示mysql正在运行
登陆到mysql中
使用root命令和刚才设置的密码来登陆到 mysql中去
$ mysql -uroot -p
但是这里又出现了错误:
$ mysql -uroot -p
ERROR 1698 (28000): Access denied for user 'root'@'localhost'
网上找了半天发现得需要使用sudo来执行,改为
$ sudo mysql -uroot -p
便成功的进入了mysql
设置远程连接
需要设置 mysql 数据库支持外部或者远程访问,则需要把绑定 IP 地址改为 0.0.0.0,或者不写IP地址。因此编辑配置文件:
$ sudo vim /etc/mysql/mysql.conf.d/mysqld.cnf
修改绑定地址为 0.0.0.0。原来默认绑定 127.0.0.1 注释掉。
bind-address = 0.0.0.0
# bind-address = 127.0.0.1
另外需要进入 MySQL 程序修改 root 账户的远程访问的权限。如果这一步不执行,则远程用 Navicat 访问时,会报 1130 错误。
$ sudo mysql -u root -p
进入 MySQL 以后输入
GRANT ALL PRIVILEGES ON *.* TO 'root'@'%' IDENTIFIED BY '您的数据库密码' WITH GRANT OPTION;
同时刷新权限
flush privileges;
修改完 mysqld.cnf 文件有最好重新启动服务器。
systemctl restart mysql.service
最终就完成了 MySQL 的安装与远程访问设置。
查看作者信息